


Angry - How I Spent 3 Days on A Reverse Engineering CTF Problem
As a beginner of reverse engineering, I spent three days in the spring break to work on a single CTF problem…
When trying to solve this CTF problem, I learnt three new techniques, angr, PinCTF, and gdb Python API.
I’d like to share the approaches I made to solve this CTF problem in this post, hopefully give you an idea of how to deal with some easy reverse engineering problems. This is not a tutorial of tools, but a walkthrough of how to analyze the information we gained from these tools. Nevertheless, I will include links to tutorials for each tool I used, so that you can easily learn it by yourself.
(#’O’) Spoil Alert: I will introduce my solution to this CTF puzzle in the following post, if you want to figure it out by yourself, you have to stop reading RN :(
Table of Contents
- Problem Description
- Start with Ghidra
- Find & Avoid with angr
- Side channel with PinCTF
- “Manually” brute force with gdb Python API
- Wrap up
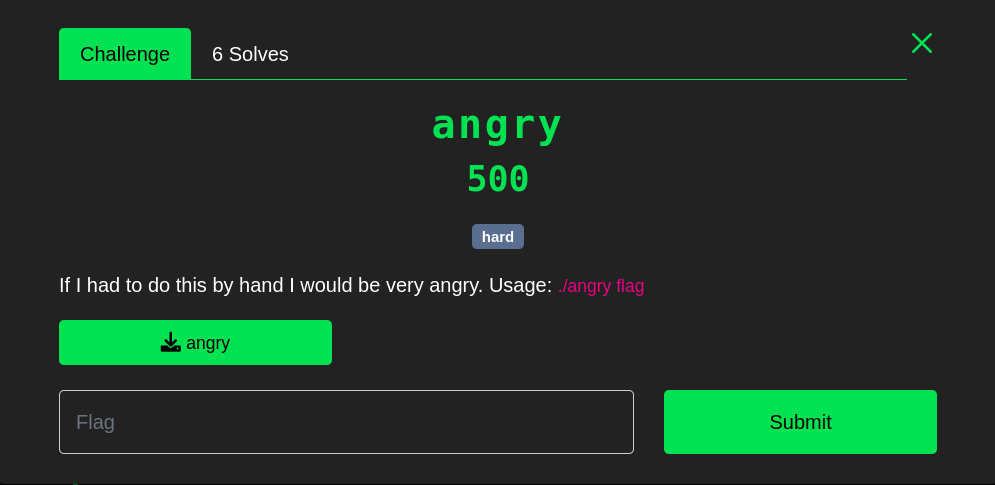
Problem Description
- Source: https://ctf.sigpwny.com/challenges#Meetings/angry-417
- Difficulty: hard
- Points: 500
- Download File: angry (I include this here just in case the link to sigpwny website doesn’t work)
If you are only interested in the source codes I used to solve this CTF problem checkout my repo.
Start with Ghidra
Useful Links:
First thing first, I used file command in Linux to check the basic information of angry. From the result shown below, I knew angry was an executable in ELF format, it was not stripped, so I could use gdb to run it.
$ file angry
angry: ELF 64-bit LSB executable, x86-64, version 1 (SYSV), dynamically linked, interpreter /lib64/ld-linux-x86-64.so.2, BuildID[sha1]=264818a1be1cdd674a24a74ad2ecaffbef7e21b1, for GNU/Linux 3.2.0, not stripped
Then I used ghidra to further investigate the executable file. Ghidra is developed by National Security Agency, written in Java. It provides a neat GUI to generate guesses of source code base on executable.
A typical screenshot of ghidra window is shown below,
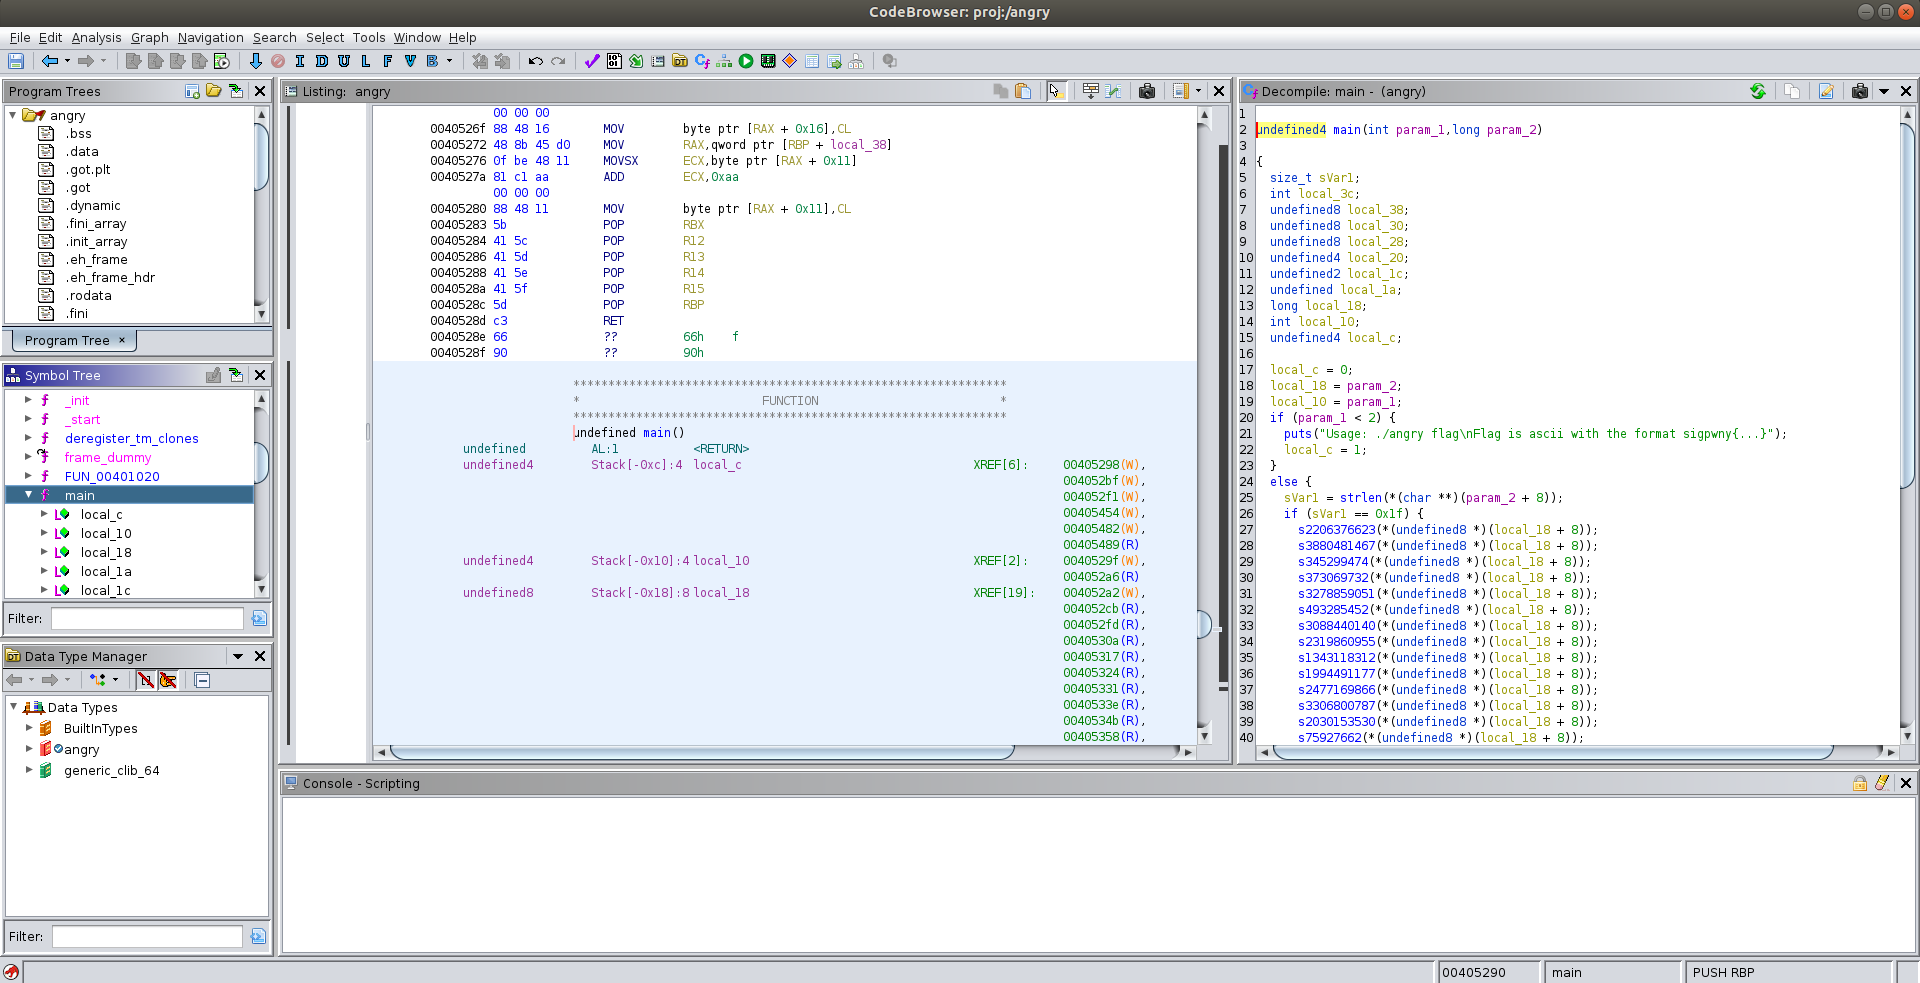
After loading angry into ghidra, I took a look at the decompilation result of main function. Below is a copy of the raw result I got from ghidra,
undefined4 main(int param_1,long param_2)

{
  size_t sVar1;
  int local_3c;
  undefined8 local_38;
  undefined8 local_30;
  undefined8 local_28;
  undefined4 local_20;
  undefined2 local_1c;
  undefined local_1a;
  long local_18;
  int local_10;
  undefined4 local_c;

  local_c = 0;
  local_18 = param_2;
  local_10 = param_1;
  if (param_1 < 2) {
    puts("Usage: ./angry flag\nFlag is ascii with the format sigpwny{...}");
    local_c = 1;
  }
  else {
    sVar1 = strlen(*(char **)(param_2 + 8));
    if (sVar1 == 0x1f) {
      s2206376623(*(undefined8 *)(local_18 + 8));
      s3880481467(*(undefined8 *)(local_18 + 8));
      s345299474(*(undefined8 *)(local_18 + 8));
      s373069732(*(undefined8 *)(local_18 + 8));
      s3278859051(*(undefined8 *)(local_18 + 8));
      s493285452(*(undefined8 *)(local_18 + 8));
      s3088440140(*(undefined8 *)(local_18 + 8));
      s2319860955(*(undefined8 *)(local_18 + 8));
      s1343118312(*(undefined8 *)(local_18 + 8));
      s1994491177(*(undefined8 *)(local_18 + 8));
      s2477169866(*(undefined8 *)(local_18 + 8));
      s3306800787(*(undefined8 *)(local_18 + 8));
      s2030153530(*(undefined8 *)(local_18 + 8));
      s75927662(*(undefined8 *)(local_18 + 8));
      s1476774293(*(undefined8 *)(local_18 + 8));
      s2172966575(*(undefined8 *)(local_18 + 8));
      local_38 = 0x858712997682b1b4;
      local_30 = 0xdae67b2d46152991;
      local_28 = 0x8fb3a7e55077d4c3;
      local_20 = 0xfaec4847;
      local_1c = 0xcbd9;
      local_1a = 0x25;
      for (local_3c = 0; local_3c < 0x1f; local_3c = local_3c + 1) {
        if (*(char *)(*(long *)(local_18 + 8) + (long)local_3c) !=
            *(char *)((long)&local_38 + (long)local_3c)) {
          puts("That flag is incorrect.");
          return 0;
        }
      }
      puts("That flag is correct! Congrats.");
      local_c = 0;
    }
    else {
      puts("That flag is incorrect.");
      local_c = 0;
    }
  }
  return local_c;
}
From the first if statement in the main function, I learnt that the input to angry should be given as a command line argument. According to the second if statement, the correct input should be 0x1f long, which is 31 in decimal.
With these in mind, I knew that a valid input for angry should be something like this,
./angry 1234567890123456789012345678901
The string 1234567890123456789012345678901 above is just specifying that the input should be 31 characters, I like to use the numbers to control my input length :)
Back to the main function decompilation, after the program pass the second if statement, it makes a bunch of function calls on local_18 + 8, which is the address of the input string. I clicked on the function names in ghidra, and investigated the decompilation results of these functions. All of them are just doing some modification on characters in the input string. Below is a snippet from the definition of the first function, s2206376623,
void s2206376623(char *param_1)

{
  param_1[0x1c] = param_1[0x1c] + -0x25;
  param_1[2] = param_1[2] + 'X';
  param_1[0x13] = param_1[0x13] + -0x2e;
  param_1[0xb] = param_1[0xb] + '?';
  param_1[0xe] = param_1[0xe] + -0x1f;
  param_1[10] = param_1[10] + -0x4b;
  param_1[5] = param_1[5] + -0x37;
  param_1[0x1d] = param_1[0x1d] + -0x1e;
  param_1[0x17] = param_1[0x17] + -0x6d;
  param_1[10] = param_1[10] + 'y';
  param_1[0x1e] = param_1[0x1e] ^ 0xb2;
  param_1[0x13] = param_1[0x13] + -0xc;
  param_1[0x12] = param_1[0x12] ^ 0x35;
  *param_1 = *param_1 + '&';
  param_1[0x1b] = param_1[0x1b] + -0x20;
  param_1[0xc] = param_1[0xc] + -0x6b;
  param_1[1] = param_1[1] + '\x10';
  return;
}
The other functions called in main are all similar with this s2206376623, they do arithmetic or logic operations on the characters, so that input string will be “encoded” by some comlicated rules.
After the list of function calls, within the second if statement, there are some local variable definitions, I didn’t find them to be useful. I jumped right into the for loop, since it was clearly the key component in this problem. Below is a copy of the for loop snippet from main function,
      for (local_3c = 0; local_3c < 0x1f; local_3c = local_3c + 1) {
        if (*(char *)(*(long *)(local_18 + 8) + (long)local_3c) !=
            *(char *)((long)&local_38 + (long)local_3c)) {
          puts("That flag is incorrect.");
          return 0;
        }
      }
      puts("That flag is correct! Congrats.");
      local_c = 0;
    }
Obviously, the for loop compares the “encoded” input string with some hidden string character by character, and sends an error message whenever a pair of inequal characters appear. If the for loop is safely passed, there will be a congrat message which indicates the input string is the correct flag.
Up to now, here’s a flow chart I concluded for the behavior of angry.
    command line input
            ||
            ||
            \/
      two arguments?      ---- No ----> Incorrect
            ||
           Yes
            ||
            \/
    flag length == 31?    ---- No ----> Incorrect
            ||
           Yes
            ||
            \/
       ------------
       | blackbox |
       | encode   |
       | each     |
       | char     |
       | in the   |
       | flag     |
       ------------
            ||
            ||
            \/
 for (i = 0; i < 31; i++) ---- encoded_flag[i] != hidden_str[i] --> Incorrect
            ||
      for loop ended
            ||
            \/
         Congrats!
It’s quite straight forward! In fact, as long as I give angry a 31-character string as command line argument, the first two “Incorrect” conditions won’t be triggered. The third “Incorrect” condition can be found inside the for loop, since whenever if statement is true, the program will puts the message and return, so the puts function call in if statement can be seen as a mark of incorrect flag. Correspondingly, the puts function call after the for loop which prints the congratulation message can be seen as a mark of correct flag.
With the incorrect flag and correct flag in mind, I used ghidra to find out the addresses of these two puts calls. Find the addresses were easy, just left click on the source code and ghidra will high light the corresponding assembly instruction for you in the assembly window.
- incorrect address = 0x0040544f
- correct address = 0x0040547d
My goal was then to let the program avoid hitting on incorrect address, and try to reach correct address. To acheive that, I used a tool called “angr”.
Find & Avoid with angr
Useful Links:
- angr source code on github
- Examples of solving CTF problem with angr
- Core concepts in angr (I read through this one to get started)
- Some example usage
Unlike ghidra which provides GUI to do reverse engineering by mouse clicks, angr is in fact a python module developed by people from the Computer Security Lab at UC Santa Barbara and SEFCOM at Arizona State University. According to its own documentation on github, angr is “a platform-agnostic binary analysis framework”.
angr provides a feature called “symbolic execution”, instead of assigning concrete values to variables during execution, angr can assign symbols to variables. Whenever the execution flow meets branches, angr will analyze all the possible paths by adding constraints on the corresponding symbols. One can manually add constraints to symbols (or even to part of a symbol). Such technique allows a much more efficient way of investigating control flows, and fits the situation of this CTF problem quite well.
A simple usage of angr is to assign a symbolic variable for input, and specify the addresses we want to avoid, together with the addresses we want to reach, then let angr to analyze the executable for us.
After reading some core concepts and some CTF examples in the angr document, I came up with the Python script as shown below,
import logging
import angr
import claripy

success = 0x0040547d
fail = 0x0040544f

proj = angr.Project("./angry")

arg1 = claripy.BVS('arg1', 31*8)

state = proj.factory.entry_state(
	args=['angry', arg1],
	add_options = angr.options.unicorn
)

for b in arg1.chop(8):
	state.add_constraints(b >= ord('!'))
	state.add_constraints(b <= ord('~'))

sm = proj.factory.simulation_manager(state)


sm.explore(find = success, avoid = fail)
print(sm.found[0].solver.eval(arg1, cast_to=bytes))
The script shown above sets a BVS variable (you can find definition of BVS in core concepts section in angr document) called “arg1”, which is 31 bytes long, I passed it as an command line argument to angry, through the state I defined for angr to begin analysis with. I then created a simulation manager base on the state.
The last two instructions are the most important ones in this script, sm.explore triggers the simulation manager to explore the program, with constraints find = success, avoid = fail, meaning the target address is success, during the exploration, fail should be avoided. After exploration, sm.found[0] gives the state found, so use it to evaluate the updated arg1, which should be the correct flag.
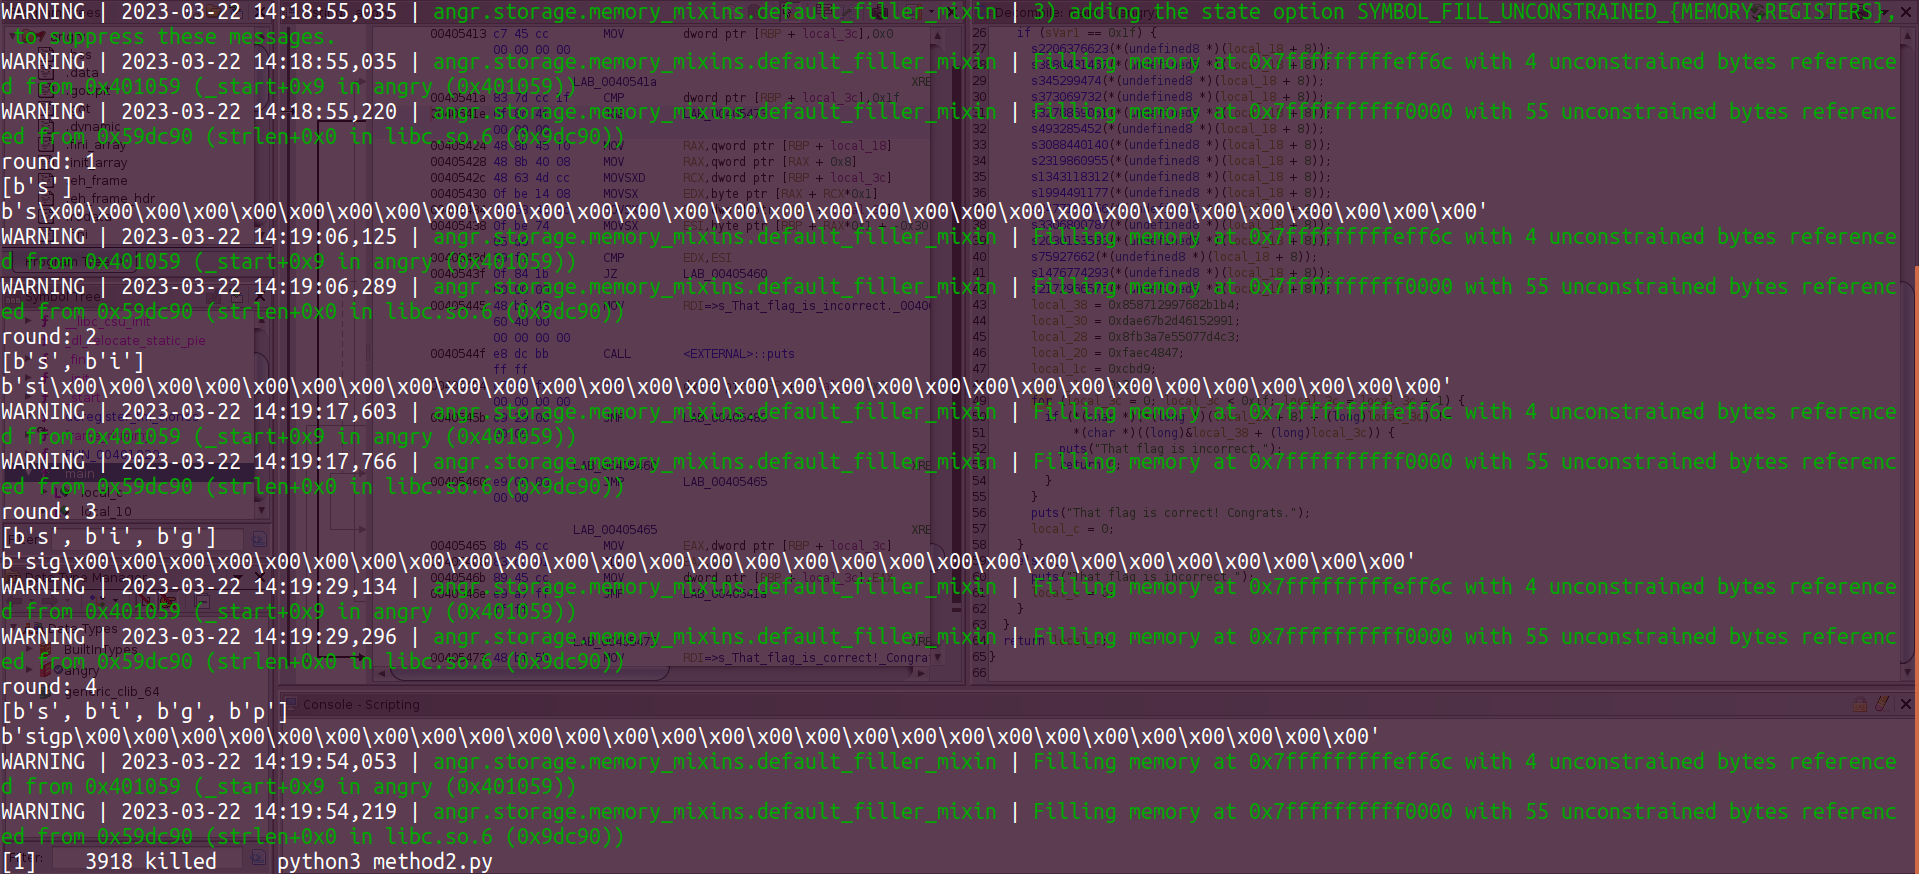
Sounds awsome! So I ran the script with 100% confidence and below is what I saw after about one minute,

What happened?? Honestly, I have no idea… Even at the time when I’m writing this blog post, I’m still not sure why angr failed to find the correct flag. I tried to use some logging support when executing the script above, and found that the memory usage of this script rapidly grows up whenever it reaches 4 “avoids” (basically means that 4 for loop failures have been encountered and avoided), the memory consumation would then kill the process.
As the problem description said that the form of the CTF flag should be sigpwny{…}, it actually revealed the first 8 bytes in the flag. I tried to set constraints to arg1 so that the first 8 bytes in this symbol are preset to be sigpwny{, however, the exploration failed again when 4 “avoids” were reached. So weird!
Since it was my first time using angr, I didn’t have a clear picture of how sm.explore work under the hood. According to the behavior of rapid memory consumation, an idea I came up with was to find the characters one by one instead of directly aiming for the success address. My approach was to view the next for loop iteration as a “success in for loop”, so whenever I reach one more “success in for loop” than before, I know that one more character in flag is corrected guessed.
With that in mind, I looked that the ghidra decompilation result once again, and found the place where for loop goes to next iteration,
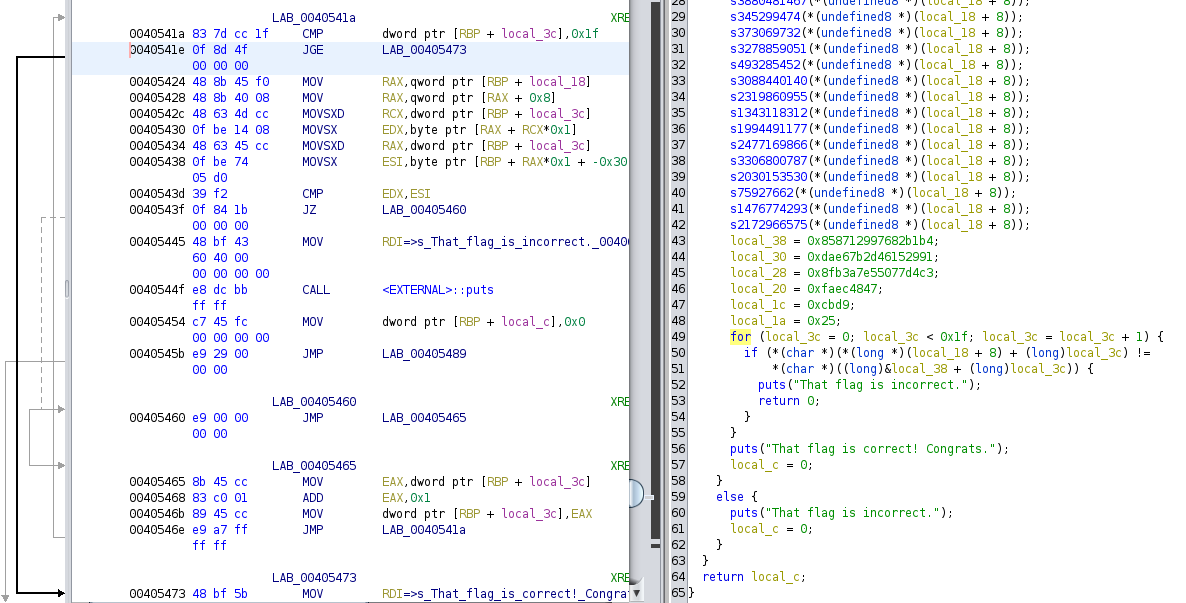
From that ghidra result, I found that for_success = 0x00405465 was an address that marked the success of one for loop iteration. So I came up with the following Python script.
import logging
import angr
import claripy

len_fail = 0x004052ec
success = 0x0040547d
fail = 0x0040544f
for_success = 0x00405465

known = []
iter_num = 0

def find_condition(state):
	if (state.addr == for_success and state.solver.eval(state.regs.eax) == iter_num):
		return True
	else:
		return False

for i in range(31):
	iter_num = i
	print('round: ' + str(i))
	print(known)

	proj = angr.Project("./angry")
	arg1 = claripy.BVS('arg1', 31*8)

	ent_state = proj.factory.entry_state(args=['angry', arg1])

	if (i > 0):
		for j in range(len(known)):
			ent_state.add_constraints(arg1.get_byte(j) == known[j])


	sm = proj.factory.simulation_manager(ent_state)

	print(sm.active[0].solver.eval(arg1, cast_to=bytes))

	sm.explore(find=find_condition, avoid=fail)
	known.append(sm.found[0].solver.eval(arg1.get_byte(i), cast_to = bytes))

s = sm.active[0]
print("Done!")
print(s.solver.eval(arg1,cast_to=bytes))
This time, the thing I tried to do was to force angr simulation to start all over again for each character, and each time when investigating one character, the characters before it should have been determined and preset as arg1 constraints. The main idea was to make sure the angr analyzer was finding the characters one by one.
Well, it failed again…
Once again, the failure showed that the memory blew up at around the 4th “avoid” which matched with the result of the previous Python script.
I also wrote and compiled a similar executable by myself, the only difference was that instead of modifying the characters in input flag before examine them in the for loop, my executable passed the input flag directly into the verification for loop. I ran the two Python scripts to exploit my own executable, and they both successed in finding out the flag!
By that point, I could be sure that what made angr to fail in this CTF executable was not the for loop, but the “blackbox” functions that modify the input flag characters.
      s2206376623(*(undefined8 *)(local_18 + 8));
      s3880481467(*(undefined8 *)(local_18 + 8));
      s345299474(*(undefined8 *)(local_18 + 8));
      s373069732(*(undefined8 *)(local_18 + 8));
      s3278859051(*(undefined8 *)(local_18 + 8));
      s493285452(*(undefined8 *)(local_18 + 8));
      s3088440140(*(undefined8 *)(local_18 + 8));
      s2319860955(*(undefined8 *)(local_18 + 8));
      s1343118312(*(undefined8 *)(local_18 + 8));
      s1994491177(*(undefined8 *)(local_18 + 8));
      s2477169866(*(undefined8 *)(local_18 + 8));
      s3306800787(*(undefined8 *)(local_18 + 8));
      s2030153530(*(undefined8 *)(local_18 + 8));
      s75927662(*(undefined8 *)(local_18 + 8));
      s1476774293(*(undefined8 *)(local_18 + 8));
      s2172966575(*(undefined8 *)(local_18 + 8));
The functions above somehow made angr cost tons of memory to analyze, even though all they did was just doing some arithmetic and logic operations on input flag characters.
If you know why this happens, please leave a comment below!!
I was then frustrated, and turned to “side channel” for help.
Side channel with PinCTF
Useful Links:
What I tried to do with the second Python script in the previous angr section was to guess the flag characters one by one from the number of iterations in the for loop I could reach. The idea was essentially some sort of “side channel”. A straightforward approach was to use the number of instructions during execution as a side channel. The more for iteration I reach, the more instructions I execute, which means larger instruction number should indicate more correctly guessed characters in the flag!
PinCTF was a tool that uses instruction counting as an avenue for side channel analysis, I heard this tool from a sigpwny presentation. PinCTF is based on Intel’s Pin Tool, which is a tool to support dynamic analysis.
PinCTF assumes that the more instructions it runs, the closer it is to the correct input, which perfectly meets this CTF problem.
Following the documentation on PinCTF’s github repo, I pulled the repo locally, installed the necessary packages, and feed it with the following command,
python3 pinCTF.py -f <path to angry directory>/angry -a -l obj-intel64/ -sl 31
Would this work perfectly?
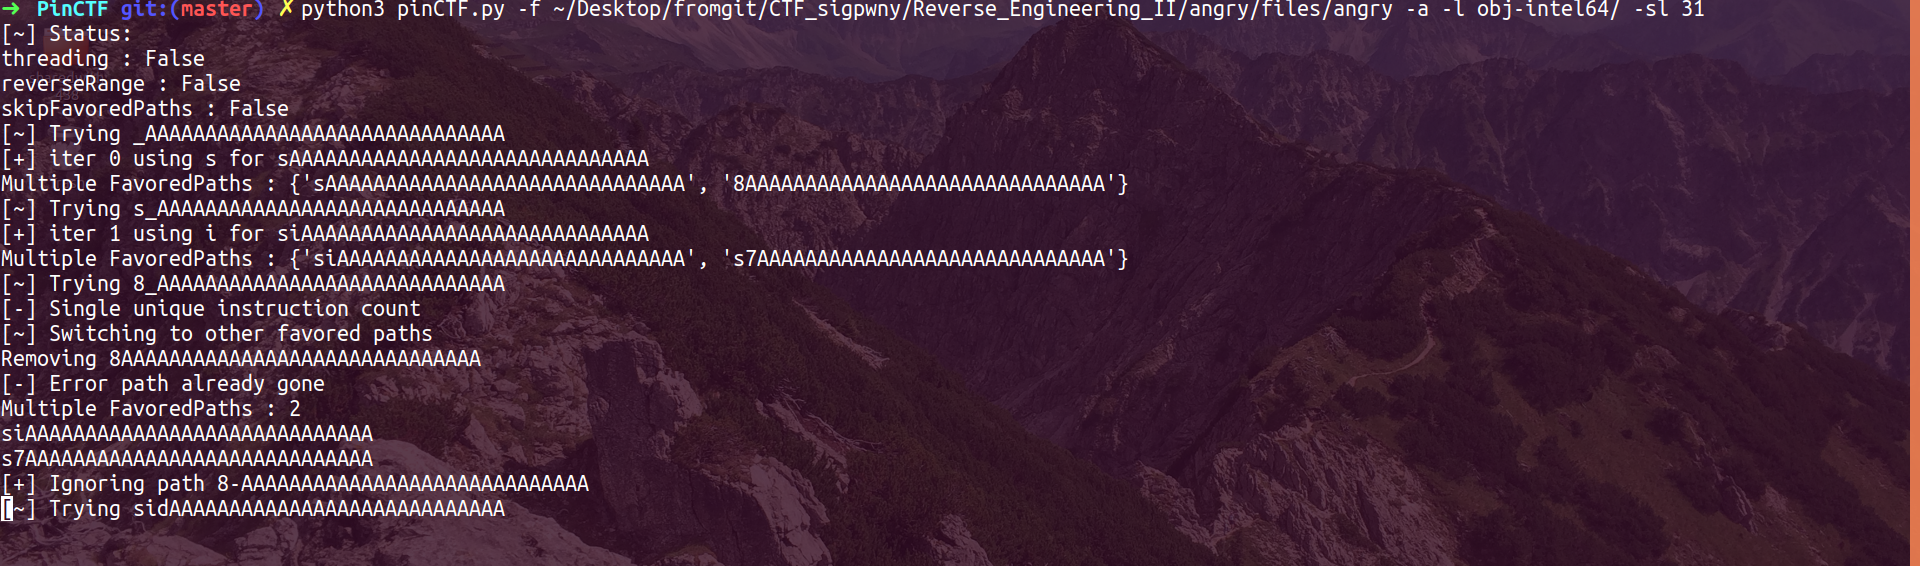
Sadly, no! :(
As shown in the screenshot above, even though the PinCTF script figured out “si” for the first two characters, it somehow had a lot of “Multiple FavoredPaths”which made the exploration taking way too long than feasible (exponential time).
Again, I was not sure why PinCTF met so many “Multiple FavoredPaths”, I guess it was because the number of instructions was too large with the inevitable “blackbox”, which made the counting went wrong occasionally. As the difference in number of instructions for success and failure for one character was too small, PinCTF might be confused accidentally and led to the failure as shown above.
I was so mad at that point, that I decided to do the for loop brute force manually …
“Manually” brute force with gdb Python API
Useful Links:
In both angr and PinCTF section, I have a pretty clear plan in mind to find out the flag. Basically, I just needed to do brute force for each single character in the flag and find out if it was correct by checking the number of iterations reached in the for loop.
To start with, I ran the following command to feed angry with a flag starting with ”s” and put it in gdb.
gdb --args angry s123456789012345678901234567890
Then I set a break point at 0x00405465 (for_success from angr section), and ran the program. When the breakpoint was reached, I printed out eax and found it to be 0. If I type continue at this point, the program will not hit the breakpoint again. The reason for doing this was based on the ghidra analysis of the for loop,
From the assembly, I knew that eax was used to update the for loop index, so by investigating eax, I could find out how many iterations have been done so far (I applied this strategy in the second Python script in angr section).
There’re ord(‘~’) - ord(‘!’) + 1 = 94 possible characters for each character in the 31 characters long flag, so the brute force only takes 94 x 31 = 2914 trials! If I manually do the gdb operations I did above, I could figure out the flag character by character in a reasonable amount of time! :)
Thankfully, I wasn’t that crazy. At least I have the concept of gdb Python API in mind even though I haven’t really used it before. So I watched an youtube tutorial to have an idea of how people use it, and then referred to the gdb Python API documentation to produce the following Python script.
import gdb

char_range = ord('~') - ord('!') + 1
# information obtained with Ghidra
for_success = 0x00405465
for_update = 0x00405468
fail = 0x0040544f
flag_len = 31
# global variables
known_flag = ''
known_len = 0
unknown_len = flag_len - known_len

# Iteration on each character in the flag
for i in range(flag_len):
	# Iteration to find next character
	for j in range(char_range):
		# skip special characters, I bet ' is not in the flag, lol
		if (ord('!')+j == ord("'")):
			continue

		# load the executable
		gdb.execute("file angry", False, True)

		# set argument
		input = known_flag+chr(ord('!')+j)+(unknown_len-1)*"0"
		gdb.execute("set args '{}'".format(input), False, True)

		# print known flag and input, so that we can see it in the end
		print(known_flag)
		print(input)

		# set breakpoint and run
		gdb.execute("b *{}".format(fail), False, True)
		gdb.execute("r", False, True)

		# examine eax
		s = gdb.execute("p $eax", False, True)

		# parsing
		num = s.split("=")
		s = num[1].split()
		eax = int(s[0], 0)

		if (eax > known_len):
			known_len += 1
			unknown_len -= 1
			known_flag += chr(ord('!')+j)
			gdb.execute("c", False, True)
			break
		print(eax)
		gdb.execute("c", False, True)
Basically, the Python script did the brute force for me by automatically setting breakpoints in for loop, and investigate the eax to decide if the character is correctly guessed. It would load the angry file each time so that command line argument could be reset for the new trial, this was the most time consuming part in the brute force process.
Eventually, to run this Python script in gdb, I launched gdb, and ran the following commands in gdb,
(gdb) source brute.py
And, the magic happened … ;)

Wrap up
Well, it took me 3 days to figure out the CTF problem, and another 3 days to finish writing this blog…
In fact, I started on this CTF problem to get some hands on experience of angr, then I got angry, and I got angry, and angry… ;)
Overall, this CTF problem showed that I was quite an unskillful reverse engineering practicer,
- If I was familiar with gdb Python API, I could have wrote the brute force solution once I saw the ghidra result.
- If I was good at reading documentations, I could have figured out why angr and PinCTF failed, and fix them quickly.
- If I was good at reverse engineering, I could have read the decompiled results in “blackbox” and figure out how it made analyzation tools to fail.
Unfortunately, I failed to meet any of the requirements above, and ended with spending three days on a single CTF problem :( Anyway, I did get myself familiar with some of the reverse engineering tools.
I hope you enjoyed this blog post, thank you for reading it!